iPhone photography is a huge topic and it could take you months if not years to master all the different shooting and editing techniques. But if you’re anything like me, you don’t want to wait for years – you want to start taking better photos today. In this article I’m sharing 10 quick and easy techniques that you can start using today to significantly improve your iPhone photos.
1. Keep Your Photos Simple
Steve Jobs used to say, “Simplicity is the ultimate sophistication,” and he was clearly onto something. New photographers often overcomplicate their photos by having too much going on in the frame, which distracts the viewer and makes it much harder to create a harmonious composition.

One interesting subject is all you really need to create a memorable photo, and it’s easy to get the composition right when your photo has only one subject. Don’t worry if the majority of your photo is filled with empty space since that will only make your subject stand out more.
Another reason to choose simple compositions is the size of the medium. If you share your iPhone photos on Instagram or a similar photo sharing network, people will view your photos on the tiny screen of their phone, and much of the detail you have in your photos will be lost to the viewer. Keep your iPhone photos simple and your audience will enjoy them.
2. Shoot From a Low Angle
The majority of iPhone photos are shot from the chest height of an adult because that’s the most convenient way to take a photo, but not necessarily the best. You can easily improve your photos by finding a more interesting angle, and often the best way to do that is to simply shoot from a lower perspective.

Shooting from a low angle makes people and other subjects more interesting simply because we’re not used to looking at them from that perspective. Besides, it allows you to show your subject with nothing but the sky in the background, which is great for removing unwanted distractions and making your subject stand out.

Another benefit of taking photos from a low angle is that you can show interesting details in the foreground that would be lost otherwise. Get down on your knees if you have to as this simple trick can really make a huge difference!
3. Show Depth in Your Photos
One of the common iPhone photography mistakes is taking flat photos that don’t show any depth and where all the subjects are located on the same plane. However, most photos – and especially landscape photos – look better if they have subjects on multiple planes.

It’s tempting to only include the background in landscape photos, but the photo above is made a lot more interesting by showing trees and the orange sand in the foreground, the large orange rock in the middle ground and the forests in the background.

In this photo the small road takes up the entire foreground and extends far into the background, which draws the reader through the scene and makes the photo more engaging.
4. Align Your Subjects Diagonally
The two main subjects in the photo above are the house in the top right and the road at the bottom left. It’s not an accident that these subjects are placed diagonally from each other. By aligning the important subjects diagonally you can make your photos more balanced and harmonious.

The large orange rock is such a strong subject that it would take all our attention if it wasn’t for the small rock at the bottom left. By aligning the subjects diagonally, I could balance the photo and make the composition more harmonious. Whenever you have multiple subjects in your scene, align them diagonally to create a balanced composition.
5. Shoot From the Level of Your Subject
The #1 mistake people make when taking photos of children and pets is shooting from the height of a standing adult, which creates a bird’s-eye-view and makes your subject disappear in the background. If you want your child or pet to stand out in the photo, you have to get down to their height. And don’t be afraid to get close.

6. Include Shadows in Your Composition
People often get so focused on photography subjects that they don’t even pay attention to the shadows. But when the sun is low, the shadows can often be even more interesting than the actual subjects of your photos, so try to include them in your composition whenever possible.

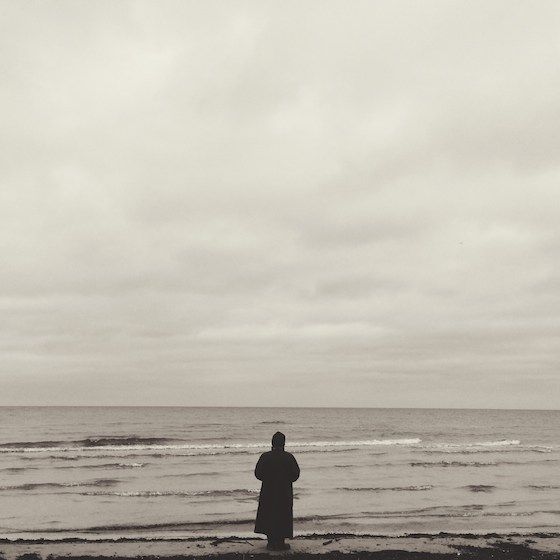
7. Take Silhouette Photos
Silhouetting is one of the most interesting iPhone photography techniques, and it’s much easier than you think. The only thing you really need to take silhouettes with your iPhone is to shoot against the source of light and your iPhone will take care of the rest.

In this photo I’m standing in the shadow of the chimney, so the sun is located directly behind it. Since I’m shooting against the source of light all the subjects in this photo are automatically turned into silhouettes.
Silhouetting works best when the sun is low above the horizon near sunset or sunrise. Just find a subject with an interesting outline (such as a person), make sure the light is coming from behind your subject, and take a silhouette photo!
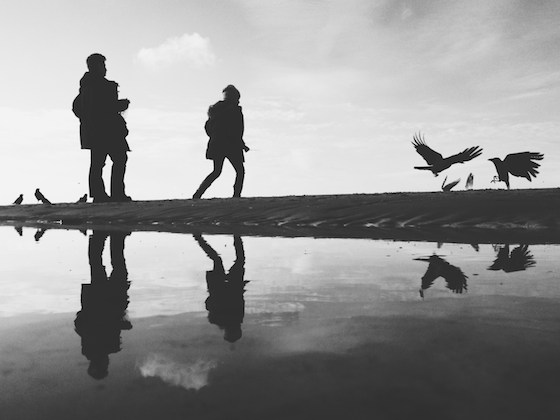
8. Photograph Reflections
Reflections are easy to miss in real life but nearly impossible to ignore in photos. While you can find reflections on many different surfaces including glass, shiny cars and ice, water is probably the best surface for reflection photography.

The coolest thing about water reflections is their ability to distort the reflection in waves. If you want to emphasize such distortions, place your iPhone just an inch above the water, which is what I did in the photo above. In case there are no waves, you can always create them yourself which is what I did in the following photo.

You don’t want to photograph the reflection alone – try to combine it with non-reflected subjects. If your photo only shows the reflection, it won’t really stand out.
Once you start paying attention, you’ll notice that reflections are everywhere – and they look great in photos!
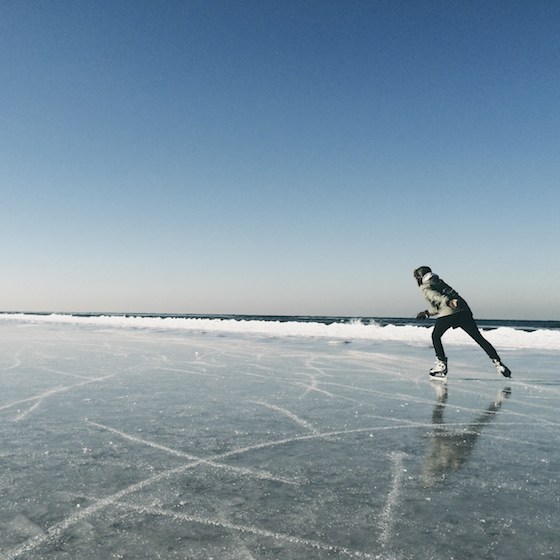
9. Use Symmetry
The reflection photos above also use symmetry, which is another great photography trick. If you look at any of the reflection photos in this article, you’ll notice that the reflected and non-reflected parts are divided exactly in half, which looks great for symmetrical reflections. But of course there are other ways you can use symmetry in your photos.

Be on a lookout for symmetrical scenes and subjects, and don’t be afraid to place them in the middle of the photo to really make the symmetry obvious.
Even though the basic composition guidelines such as the rule of thirds don’t suggest placing your subjects symmetrically in the center, you can’t argue with the dramatic perfectionist look you can create with symmetry.
10. Edit With VSCO Cam Presets
While entire books have been written about the topic of photo editing, you don’t need to overcomplicate things to create amazing photos with your iPhone. The easiest way to apply powerful but subtle artistic effects to your photos is to use VSCO Cam photo editing presets.

Just open VSCO Cam, load the photo and tap on the editing icon, which will automatically take you to the presets. There you can try out all the different presets and change their strength if needed. You can also download more presets, both paid and free, from the store inside the app (I recommend getting the largest preset pack).
VSCO Cam presets allow you to apply beautiful but subtle artistic effects in seconds, while also making it hard for you to overedit your photos. This makes VSCO Cam my favorite app for one-tap photo editing, and you don’t need any technical knowledge to do amazing edits with VSCO Cam presets.
11. Apply What You Just Learned
I know that a list of 10 photography tips may seem overwhelming, but you don’t have to get it all right. In fact, there’s no way you could possibly use all these tips in one photo or even in one day of photography.
But if you pick just one of these 10 tips – the one that speaks to you the most – and apply it the next time you take photos with your iPhone, I know you’ll be very happy with the results… at which point you should come back, pick another tip and apply it as well. Good luck!
If you enjoyed this tutorial, please sign up for my email newsletter where I send out exclusive iPhone photography tips and tutorials that you won’t find anywhere on this blog.
19
FEB