5 Most Common Mistakes in Wildlife Photography – and How to Avoid Them
0Comments
0Comments
A Post By: Anne McKinnell
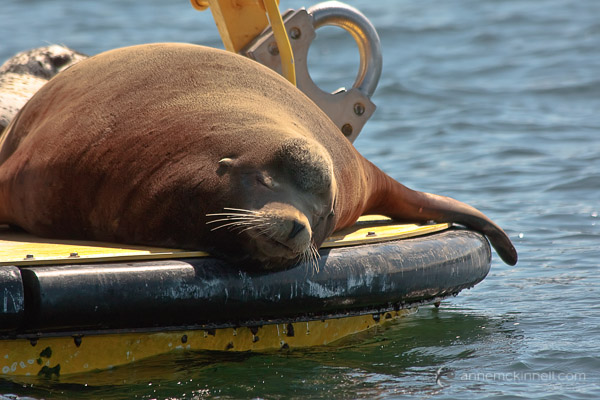
Animals, especially wild ones, make such beautiful subjects that we cannot resist turning our cameras on them to capture images of these majestic creatures in their natural state.
Unlike a landscape, creatures are constantly in motion, and unlike most people, they can be pretty uncooperative when it comes to getting their picture taken. This can make for a lot of botched pictures. Here are a few tips on how to avoid some of the common pitfalls of wildlife photography.
1. A Tiny Subject
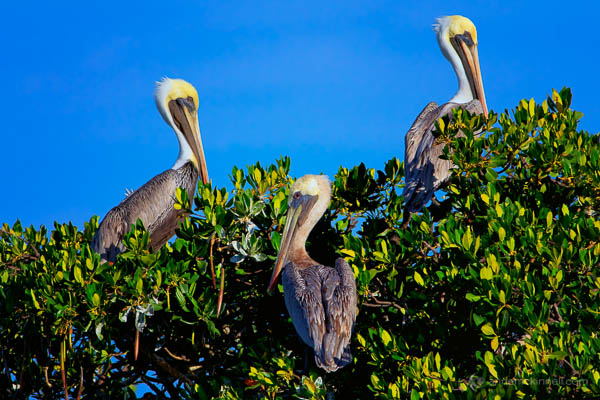
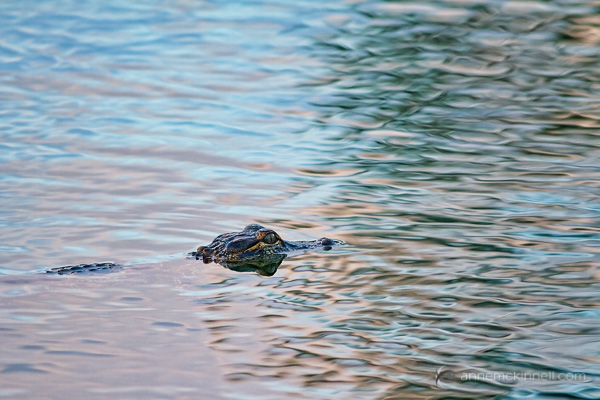
It’s tough to approach a wild animal – they are easily spooked. Because of this, many wildlife photos have more wilderness than wildlife, with the animal becoming a tiny speck in its environment. This can be effective in some situations, but for the most part you want the animal to be large enough in the frame to see the detail in its eyes. This is where a good telephoto lens can really help you out. Using a long focal length (over 200mm) will allow you to keep your distance while still filling the frame.
2. Blurry Image
Blur comes in many forms. Your entire image could be blurry due to camera shake; a problem which is magnified by the longer focal lengths needed for wildlife photography.
In landscape photography, using a tripod is a good technique to prevent camera shake, but a tripod is not as practical when photographing wildlife. Wildlife photography requires a more active shooting style – you’ll be moving around constantly – so unless you are using a lens that is too big to hold comfortably, forget the tripod. Also, because the animals are always in motion, you’ll need a fast shutter speed anyway. That leads me to the first method to combat camera shake blur: using a very fast shutter speed.
In landscape photography, you normally use a shutter speed that is at least 1/focal length of your lens. But usually that isn’t going to be fast enough when photographing wildlife because the animals are always in motion (even when they appear to be standing still). To avoid disappointment, you’ll need to use a much faster shutter speed to freeze both your own motion and the motion of the animal.
Here is my rule of thumb when photographing wildlife: if the animal appears to be still, use a shutter speed of 1/500th of a second. If the animal is moving, you’ll have to adjust the shutter speed based on how fast they are moving. I suggest a minimum of 1/1,000th of a second, or faster if the animal is moving faster.
Using a lens with image stabilization will also help prevent camera shake blur. A lens with a wide maximum aperture, say f/2.8 or even f/4, will let more light in, allowing you to use a faster shutter speed. Likewise, a camera with low noise at high ISOs will let you turn up the sensitivity. All of these options will enable you to make faster exposures with better results.
Another type of blur is focus blur. This results from your camera being unable to focus, probably because your subject is moving and the AF motor gets confused. Some cameras and lenses have superior auto focus systems to others, but regardless of what you have, you can get the most out of it by setting it to continuous focus mode, usually called AF-C (Nikon) or AI Servo (Canon). This setting will track the subject’s movement in the frame and focus on it more quickly and accurately.
3. The Missed Moment
We’ve all been there. You see the perfect shot, frame it, and hit the shutter. But by the time the camera focuses and the exposure is made, the animal has moved and all you end up with is the second after the perfect shot.
There are two ways to avoid this heartbreak:
Anticipation
This is a skill that can only come with practice and a keen eye. If you can learn to see when the perfect moment is about to happen, rather than when it is happenning, you can hit the shutter right before the peak moment and cause the camera to snap at just the right time.
Continuous Shooting
When animals are in motion, you’ll get the best chance at a good result by using continuous shooting mode (also called “drive mode” or “burst mode”). With this, you can take several images per second and choose the most successful.
Higher-end DSLRs and mirrorless cameras will have a much faster maximum shooting speed, but no matter which camera you have, there are a few things that will help get the highest continuous shooting rate.
One is a fast memory card – both SD (standard digital) and CF (compact flash) cards have a certain speed that they operate at, and a faster card will make sure that your camera doesn’t get bogged down trying to save the images.
The other is a fully-charged battery – as the juice drains, the camera can become sluggish, so it’s a good idea to keep an extra battery or two in your camera bag. For ultimate performance, you can buy a battery grip that fits on your camera. This holds two batteries at the same time for maximum speed.
4. Where Is Everyone???
Sometimes wild animals can be hard to find, and they’re not always where you want them to be. Before you can photograph them, you have to learn a few things about how to find them.
Know your animals
What types of animals live around you? Before you go out shooting, find out who they are, what they eat, when they sleep, and where they like to relax in between. If you’re photographing birds, research which ones are to be found in your area at which times of year. It’s also important to know how animals might react if, and when, they feel threatened – will they fight, or flee?
Know the season
Some animals will be much more active at different times of year – particularly during autumn, as they rummage up enough food for winter, and in the spring when some animals come out of hibernation.
Camp out
I don’t mean overnight (unless you’re into that), but it’s often a very effective practice to find a popular area – probably somewhere with a source of water, food, shade or shelter – where animals like to congregate. Set your camera up on a tripod nearby, and disguise yourself among some trees or brush (some photographers go so far as to buy ,or build, a blind to hide their presence).
Be patient
Animals work on their own schedule, so don’t try to fit a shooting session in between other appointments. Great photos take time, and you must allow nature to unfold at its own pace. Many animals are easily frightened, so being quiet, still, and inconspicuous will help put them at ease.
5. Animal Attack!
We don’t call it “wildlife” for nothing – the biggest mistake you can make is accidentally getting mauled. Animals are not adjusted to polite society, and can be pretty rough customers if you catch them at the wrong time, or in the wrong way. They spend most of their waking lives foraging for food, and a spat over a meal can turn ugly, fast. Never get in the way of lunch, unless you want to take its place.
Don’t approach a wild animal directly, and if they see you, avoid looking them in the eye. This is usually a sign of aggression. If you need to get closer, keep low and move in a broad zig-zag pattern to avoid frightening the animal.
Be aware of when mating season (or “running season”) is for the type of animal you’ll be photographing. Male mammals are full of testosterone at this time of year, and can be aggressive, violent, and very dangerous. Avoid photographing at these times. Similarly, find out when animals are likely to be giving birth and raising their young. We all know how risky it can be to get in between a mama bear and her cubs.
Whenever you’re dealing with wildlife, always remember that any creature can be dangerous when provoked, and it’s very important to treat animals and their habitat with the utmost care and respect.
For more tips on wildlife photography try these articles:
If you enjoyed this article, you might also like…
Read more from our Tips & Tutorials category.

Anne McKinnell is a photographer, writer and nomad. She lives in an RV and travels around North America photographing beautiful places and writing about travel, photography, and how changing your life is not as scary as it seems.
You can read about her adventures on her blog and be sure to check out her free photography eBooks.
If you enjoyed this article, you might also like…
-
Pixily Frame
Great tips – thanks for sharing!
-
R.M.Watkins
Another thing to take into consideration is wind direction. You can wear camo and be well hid, but if you are upwind of them they can catch your scent and take off. So try to find a location where you are down wind from them.
Glossary: Upwind-the air is moving from you toward the animal. Downwind-the wind is moving from them toward you.
Join 1,417,294 Subscribers!
Polls
Do you shoot in the rain or inclement weather?


Join Our Email Newsletter |
|
Join 1,417,294 Subscribers!
Join Our Email Newsletter |
|
Receive a FREE SAMPLE of our
Portrait Photography Ebook

- Guaranteed for 2 full months
- Pay by PayPal or CreditCard
- Instant Digital Download
Receive a FREE SAMPLE of our
Portrait Photography Ebook
- Guaranteed for 2 full months
- Pay by PayPal or CreditCard
- Instant Digital Download
Receive a FREE SAMPLE of our
Portrait Photography Ebook
- Guaranteed for 2 full months
- Pay by PayPal or CreditCard
- Instant Digital Download
Sign up to the free
DPS PHOTOGRAPHY COURSE
- Guaranteed for 2 full months
- Pay by PayPal or CreditCard
- Instant Digital Download
![]() GET DAILY free tips, news and reviews via our RSS Feed
GET DAILY free tips, news and reviews via our RSS Feed

Sign up to the free
DPS
PHOTOGRAPHY COURSE
- Guaranteed for 2 full months
- Pay by PayPal or CreditCard
- Instant Digital Download
Sign up to the free
DPS
PHOTOGRAPHY COURSE
- Guaranteed for 2 full months
- Pay by PayPal or CreditCard
- Instant Digital Download