“The Winners of the NYIP Photography Courses Are…” plus 2 more: Digital Photography School |
|
- The Winners of the NYIP Photography Courses Are…
- Canon EOS 70D Review
- The Hidden Secrets of Lightroom 5’s Loupe View
|
The Winners of the NYIP Photography Courses Are… Posted: 30 Oct 2013 06:10 PM PDT
The response was terrific with over 400 entries. In fact, it was so great that the team at NYIP decided to offer a special $100 discount off any of the courses (details below). But first – here are the 5 winners of the competition:
A Message from NYIP (and a $100 discount)“Wow! Here at NYIP we were thrilled with the quality and the quantity of the responses we received for this contest. As always, the DPS community came out in full force looking for quality photography education. Unfortunately, not everyone can win. But for those of you who did not win, we’d like to extend a special discount on the NYIP course of your choice. ??The discount code ‘AD1′ can be used when you enroll online or by phone to save $100 off either payment plan on any of NYIP’s courses. Simply get started by visiting www.nyip.edu. *Offer ends November 30, 2013. Thanks again for all the wonderful submissions, The NYIP Team” Winners will be emailed with details of how to collect their prize by the team at NYIP. Thanks again to everyone for entering and to NYIP for sponsoring this competition.
Post originally from: Digital Photography Tips. Check out our more Photography Tips at Photography Tips for Beginners, Portrait Photography Tips and Wedding Photography Tips. The Winners of the NYIP Photography Courses Are… The post The Winners of the NYIP Photography Courses Are… by Darren Rowse appeared first on Digital Photography School. |
|
Posted: 30 Oct 2013 11:37 AM PDT
It seems such a long time since this camera’s predecessor — Canon EOS 60D — was launched. And it was. About this time, three years ago and lots has happened in the interval. MILCs are here for one thing but there are still plenty of DSLR-coholics craving for an optical view of the world. I have to admit I am prone to slaver a little when I look through an optical viewfinder. Just like the old days! The camera was reviewed with the Canon EF-S f3.5/18-35mm IS STM lens. The camera, in Canon’s lineup, is located above the EOS 700D.
Canon EOS 70D Features
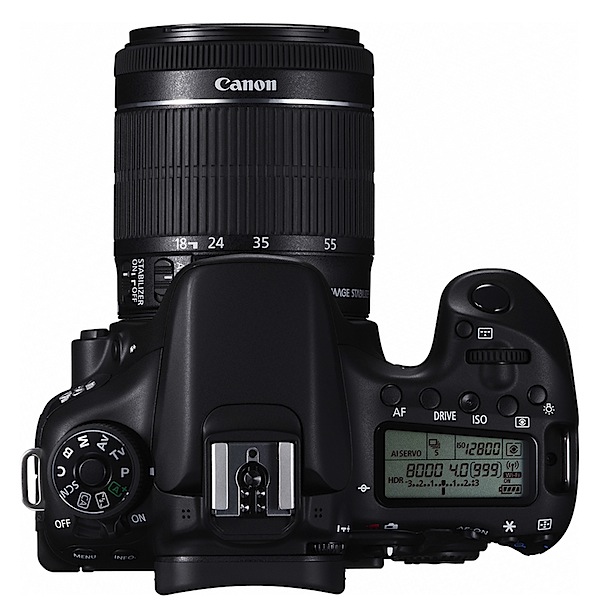
The camera captures a maximum image size of 5472×3648 pixels or 46x31cm as a print. [embedded content] Movies can be shot in MPEG4 up to Full HD at 1920×1080 pixels resolution. Yes, you can shoot stills in the middle of a video recording but the video is briefly interrupted. A neat feature is video snapshot: each short clip can be set to last two, four or eight seconds; you can add each clip to the tally as you shoot so you end up with a bunch of short videos, neatly edited together. To be honest, I haven’t found a place for the feature in my style of video making … but give it time! HandlingThe camera gains (or loses!) from the small sensor in that the whole package is less daunting in size and weight than a full frame DSLR. The speed grip at right is substantial so your right fingers can grasp it securely. Left hand holds left of the body and you could maybe fire away with a single (right) handed grasp — but you’d need practice. ControlsTucked away, behind the lens, is the button which kicks up the flash cell; external wireless flash can also be hooked up. Top: against the usual approach, the power lever is sited to the extreme left, right next to the ten position mode dial. This has a useful locking button so your setting won’t shift.
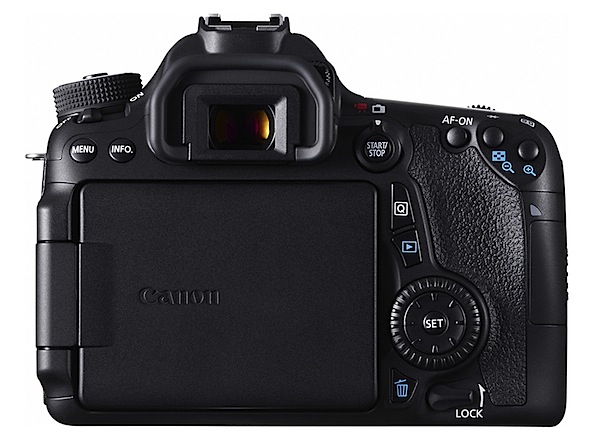
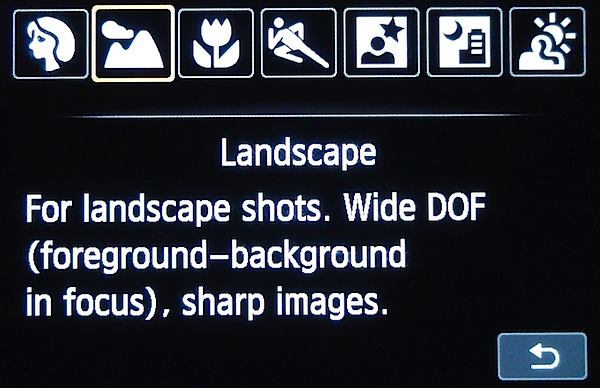
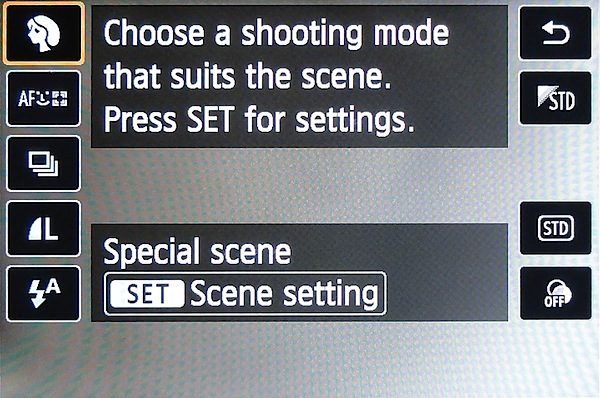
On it are positions for auto, PASM plus Bulb, flash off, special scenes (portrait, landscape etc), creative auto (aperture control, single/continuous shooting and flash options) and a custom setting. Just beneath this dial are the menu and info buttons. Top, off to the right: dioptric control for the optical finder, status screen (plus its light button) topped by buttons for AF, single/continuous shooting, ISO and metering mode. A little forward is the command dial, aperture/shutter speed button … and of course, the shutter button. If you’re looking for some way to preview depth of field, then head to the lens barrel and a tiny button in its base. Rear: off to the right you’ll find a button and lever which takes you from the optical finder view to the Live one, then gives you the option of shooting stills or video. Quite a good arrangement. Further right is an AF start/stop button, one for auto exposure lock and another for selection of the AF point or zone. Lower down is the Quick control button that takes you rapidly into such areas as single/continuous shooting, metering modes, image size etc. If you think the 70D provides multiple access points to camera controls … you’re right!
Beneath the Q button is replay, trash and the multi controller (plus SET button). Lower still is the lock button which can prevent the main dial, Quick control dial and multi controller from shifting and an accidental alteration of a setting. If you’re in the habit of passing your camera around to others for a shoot, this will lock in your carefully chosen settings!
Get GoingPossibly a measure of this control layout is how easy the camera is to pick up and get going. Or not! On test sessions my first chore is to shoot the ISO tests. Dealing with the camera’s controls fresh out of the box is usually a good indicator of camera user friendliness. OK. Go to the mode dial. Set it to aperture priority. Next, select a small, focus friendly aperture. Move to the front command dial; there is no rear dial, so Canon calls this one the ‘main dial’. Wind it down to f16. Cool. Next, I want to set the ISO number. Move to the tiny button on top, marked ‘ISO’. I want to use manual focus, so I next headed for the lens barrel and switch it from AF to MF. Nearby also is the stabiliser on/off switch. Easy peasy. And I was up and away! The menu arrangement is comprehensive and easy to follow — but it is extensive! I suggest you become familiar with it as there are many options and you could easily find yourself bamboozled. Canon EOS 70D ISO Tests
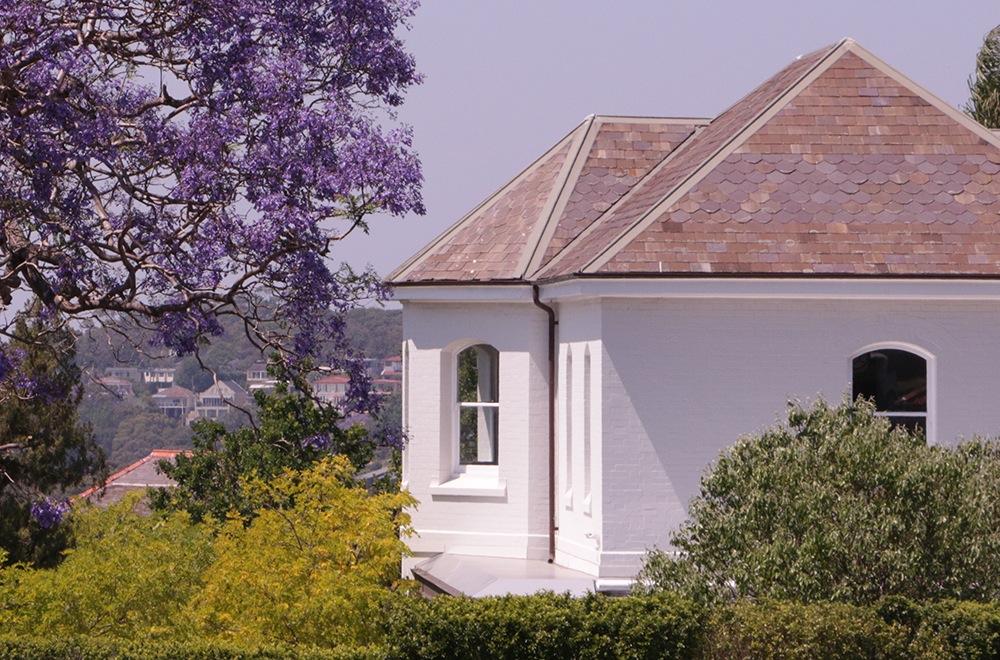
Noise only became noticeable at ISO 6400. Useable. There was a substantial increase in noise at ISO 12800. A little dodgy. Canon EOS 70D Review VerdictQuality: I was quite blown away by the quality of this camera’s images; not only were they super sharp but the coloration was dead accurate. The focus was super fast and super accurate. The stabiliser works well, esp in video shooting. Note: three handheld scenes in the video clip were shot without the stabiliser in action. So I reshot one more video shot (the wall and gate) with the stabiliser in play. Much better! Why you’d buy the Canon EOS 70D: a DSLR that won’t break your bank or bend your shoulders. Why you wouldn’t buy the Canon EOS 70D: check your expertise level! One of the best new models I have seen for a while. Canon EOS 70D SpecificationsImage Sensor: 20.2 million effective pixels.
Post originally from: Digital Photography Tips. Check out our more Photography Tips at Photography Tips for Beginners, Portrait Photography Tips and Wedding Photography Tips. The post Canon EOS 70D Review by Barrie Smith appeared first on Digital Photography School. |
|
The Hidden Secrets of Lightroom 5’s Loupe View Posted: 30 Oct 2013 08:37 AM PDT
Last week I showed you how to use Lightroom’s Grid View. Once you have customised the Grid View to suit your needs, it is time to move on to the Loupe View. Getting there is easy. Just press the letter ‘E‘ on your keyboard. This will take you to the Loupe View from anywhere in Lightroom. Alternatively, if you are in the Grid View, you can press the space bar. On the surface, Loupe View looks simple. But there are a few things I’d like to show you that you may not be aware of. They are the ‘hidden features’ of Lightroom’s Loupe View, and will help you when you view your images, and assess their potential for creative processing.
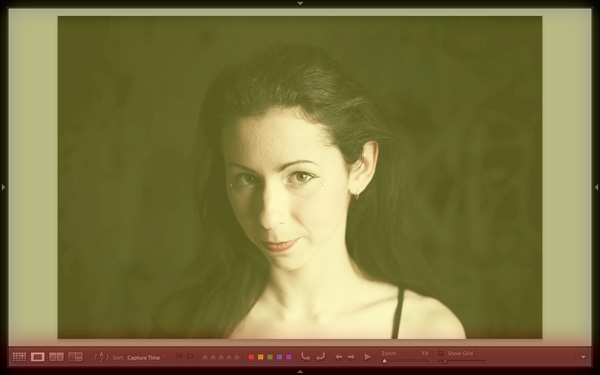
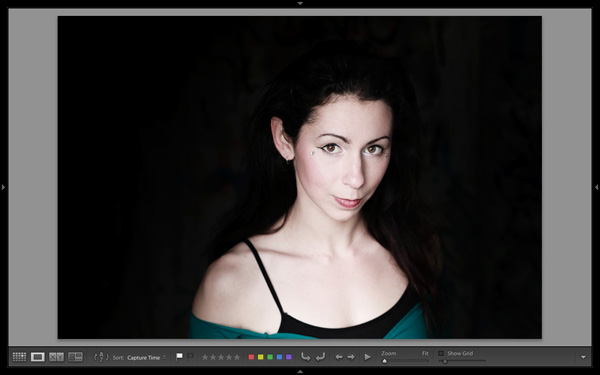
This is what the Loupe View looks like, with all four side panels removed (use the Shift+Tab keyboard shortcut to hide them from view).
The Loupe View is divided into two parts. The Content window (yellow) occupies the main part of the screen. The selected photo is displayed here. The Toolbar (red) lies along the bottom. Press ‘T‘ to reveal it if it isn’t there. The same key hides the Toolbar if you press it again. The main difference between the Loupe View and the Grid View is that you can only view one image at a time in the Loupe View. The hidden featuresOf course, these features are not really hidden. But if you are not aware of them they may just as well be. They are all useful, so it’s worth taking a few minutes to learn how to use them. Library view optionsWhen you press the ‘I‘ key on the keyboard Lightroom displays some information about the photo you are looking at in Loupe View. Press the ‘I‘ key again and the information changes. Finally, press it once more to hide the information:
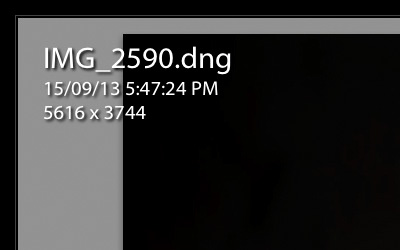
The first information overlay displays the filename, the time and date the photo was taken, and the image size (in pixels).
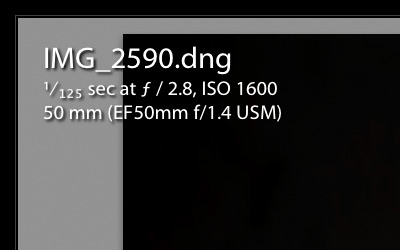
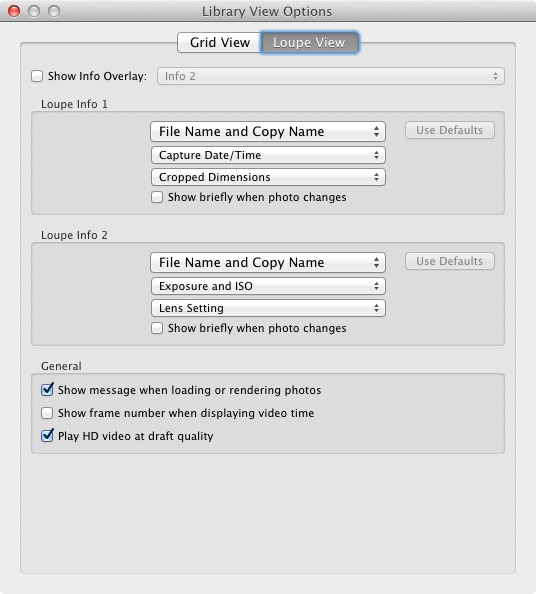
The second overlay shows the filename, the exposure settings (shutter speed, aperture and ISO) and the focal length and lens used. This is handy for checking the camera settings when you are viewing your images. Here’s the hidden feature: Did you know you can customise the information overlays to display the information that you want them to? Go to View > View Options to bring up the Library View Options window. Here you can tell Lightroom which information to display in each information overlay:
Mirror image modeWondering how your photo would look if it was back to front? Just go to View > Enable Mirror Image Mode to see:
Grids and guides
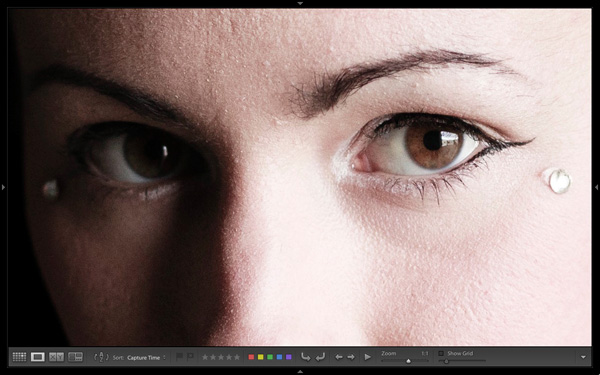
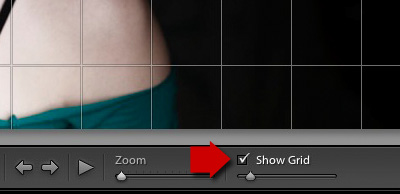
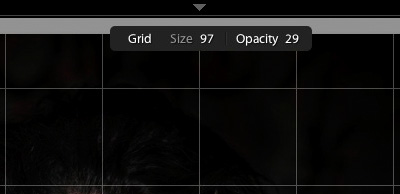
To reveal the grids and guides, tick the Show Grid box in the Toolbar. Use the slider to set the size of the squares. If you hold the Cmd key down (PC owners should use the Ctrl key) you can also alter the size of the grid and the opacity of the lines by mousing over the Size and Opacity settings displayed at the top:
Note: If you don’t see the Show Grid box, click on the white arrow on the right hand side of the Toolbar and select Grid Overlay from the menu. Lightroom removes any unticked options in this menu from the Toolbar.
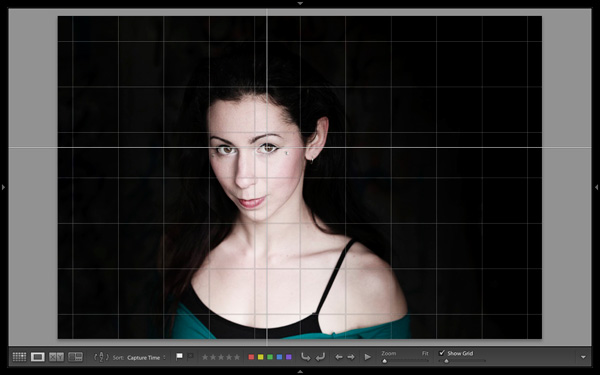
Next, go to View > Loupe Overlay and select the Guides option. This turns the central horizontal and vertical grid lines into guides that you can move by holding down the Cmd (Mac) or Ctrl (PC) keys. They come in useful for checking things like the straightness of horizons and buildings.
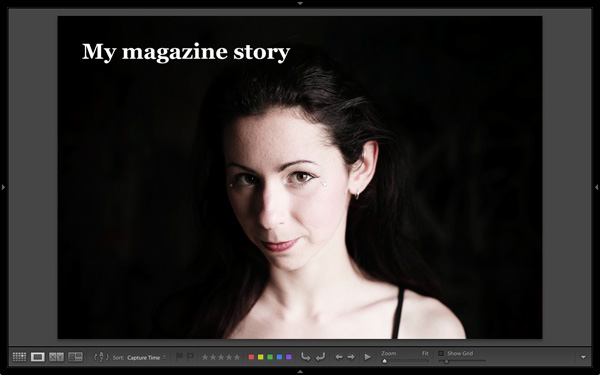
Untick the Show Grid box to see the Guides by themselves. The Loupe OverlayThe final hidden feature is something that is more likely to interest professional photographers than hobbyists. But it comes in handy as a creative exercise if you have any interest in submitting images to stock libraries or to magazines. When buying images for editorial use, magazines often look for photos with empty space where they can lay out headings or text. The Loupe Overlay feature lets you display an overlay containing text over the top of your image so you can see whether the composition of your image provides enough space. While pros can obtain an official file from their client, there’s nothing to stop you making up your own. Go to View > Loupe Overlay > Layout Image. Navigate to the folder containing your overlay and open it. The file must be saved as a PNG file, which supports transparency.
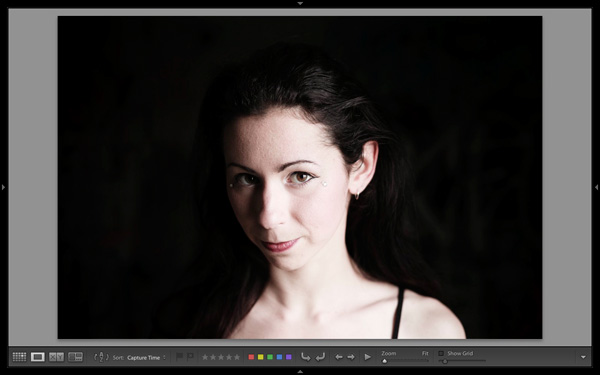
In this example, you can see that the portrait isn’t composed in a way that works with the sample text. It would have been better if the model was further to the right in the frame. Mastering Lightroom Book One: The Library Module
My latest ebook Mastering Lightroom Book One: The Library Module is a complete guide to using Lightroom’s Library module to import, organise and search your photo files. You’ll learn how to tame your growing photo collection using Collections and Collection Sets, and how to save time so you can spend more time in the Develop module processing your photos.
Post originally from: Digital Photography Tips. Check out our more Photography Tips at Photography Tips for Beginners, Portrait Photography Tips and Wedding Photography Tips. The Hidden Secrets of Lightroom 5’s Loupe View The post The Hidden Secrets of Lightroom 5’s Loupe View by Andrew Gibson appeared first on Digital Photography School. |
 A BIG thank you to everyone who entered our recent
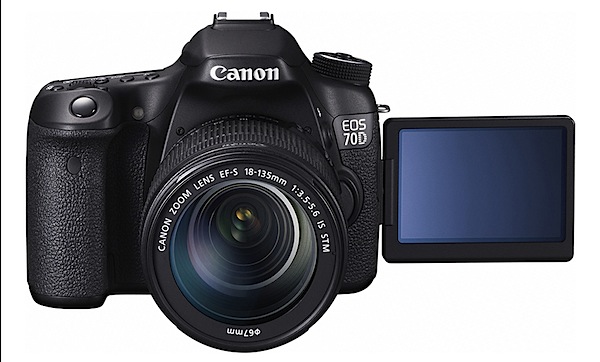


| You are subscribed to email updates from Digital Photography School To stop receiving these emails, you may unsubscribe now. |
Email delivery powered by Google |
| Google Inc., 20 West Kinzie, Chicago IL USA 60610 | |