“Nikon Coolpix P7800 Review” plus 1 more: Digital Photography School |
|
|
Posted: 26 Nov 2013 12:17 PM PST
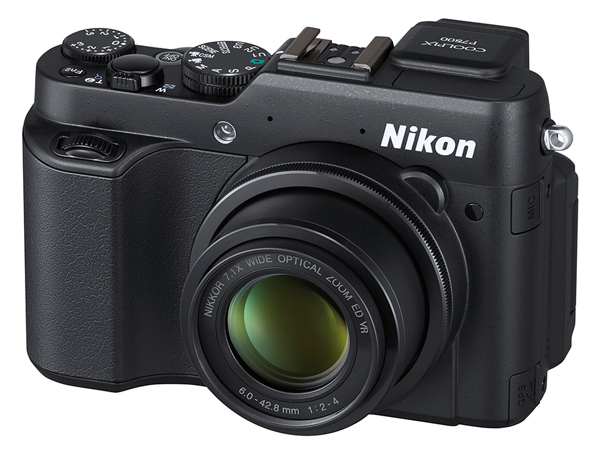
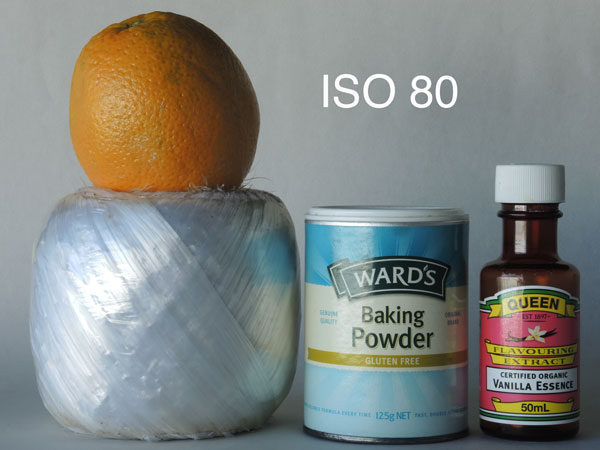
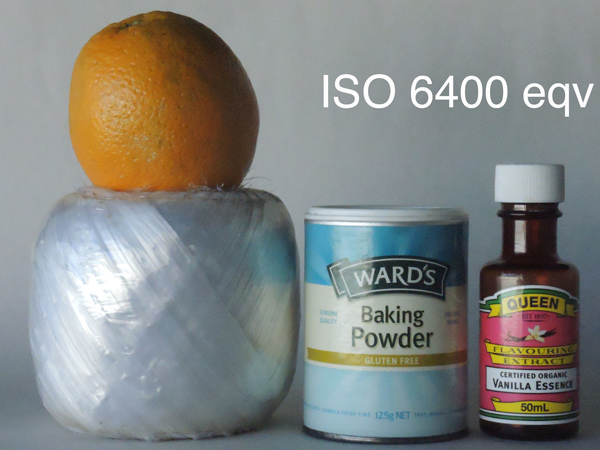
It helps now and then to look around the market and see what’s out there. Occasionally, a downscale camera that has escaped your notice can precisely answer your needs. Successor to the COOLPIX P7700, reviewed only six months ago, the P7800 delivers full-scale manual shooting, with some functions normally available only in DSLRs. Features of the Nikon Coolpix P7800Zoom lensIt has a 7.1x optical zoom that runs a 35 SLR equivalent range of 28-100mm. Sure, it’s not in the same territory as Sony’s 30x zoom model, the DSC-HX50V, nor Canon’s SX50 HS with a 50x zoom lens. But, as many have found out, these maxi zoomers need a considerable amount of TLC to bring home the picture bacon: steady hands, a firm support for the camera and a shooting environment that does not cloud distant views with atmospheric haze. Personally, I’ve found compact digital cameras with zooms up to 10x to be practical picture takers so, with a 7.1x zoom like the P7800, you’re well within handheld territory. Along with this is a pocketable size and manageable weight. Maximum apertureAnother bonus is the lens’ fast maximum aperture at f/2.0. This drops to f/4 as you head towards maximum telephoto but becomes no smaller. |
|
How Low Can you Go? An Illustration of Camera Angle for Wildlife Photography Posted: 26 Nov 2013 07:27 AM PST This is a guest article by photographer Paul Burwell Whenever I teach wildlife photography, I inevitably go on at some length about the necessity of trying to get your camera near the height of your subject’s eyes. This concept doesn’t only apply to wildlife photography, it applies equally well to photography of people, pets or hobbits. When I teach this concept to a group of students, their eyes tend to glaze over until I put some images in front of them that can really illustrate the point. Safety firstIt obviously isn’t always practical or safe to get into a lower shooting position. This is true if you’re dealing with larger animals and especially predators, getting low may trigger their prey response where they start to consider you a potential snack, or in my case a meal. It isn’t just your health I’m concerned about, as it seems the regular response to some sort of animal attack is for the authorities to track down the offending critter and end its time on earth. So, when I’m telling you that your pictures will improve if you can get lower and match your subject’s eye level, you do still need to THINK about what you’re doing and the sort of subject you’re dealing with. No photograph is worth either your health, or the health of your subject. How camera angle effects your imagesI thought I’d use the following images, of the extremely dangerous and elusive Richardson’s ground squirrel, to illustrate how images improve as the angle of the camera to the subject changes in respect to the level of the subject’s eyes. This is the perfect critter for this topic because, depending on the squirrel’s posture, its eyes are somewhere between one and six inches (2.5 to 15 cm) above the ground. All of the images below were photographed with my full-frame Canon DSLR along with the Canon 500mm lens with a 2.0x teleconverter on it for an effective focal length of 1000mm. All of the images were made at an aperture setting of f/9, the standard setting I use on this lens/teleconverter combination when I’m wanting as little depth-of-field as possible while at the same time stopping down a bit to compensate for the sharpness lost by using the teleconverter. 1000mm is roughly equivalent to about a 20x zoom, if you are using a point-and-shoot type camera, from what our bare eyes would normally see. ExamplesThis first shot was taken from my vehicle with the lens resting just on top of the window opening. The extreme focal length (or magnification factor) of images made with a super telephoto lens does help minimize the apparent difference in height (which ended up being about four feet or 1.2 metres) but you can still tell it was shot looking down at the squirrel. 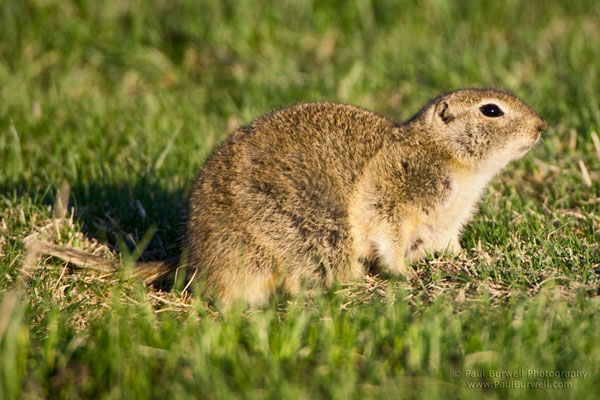
Richardson’s Ground Squirrel sitting on the grass – shot from four feet height (1.2 meters) On this next photo below, using my tripod with the lens about 18 inches (45cm) above the ground, you can really see how the camera angle has changed and how nicely the background resolves into a whole bunch of nothingness (technically called bokeh), but there is still an element of peering down on the ground squirrel. 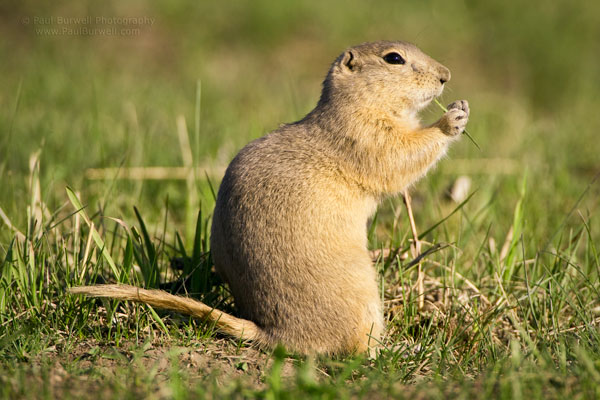
Richardson’s Ground Squirrel eating a piece of grass – shot from 18″ camera height The effect of getting your lens closer to your subject’s eye level is that the viewer of your images is able to look at the subject without looking down at it and the innate connection between the viewer and the subject is a lot more intimate and compelling. So what happens when you get even lower to the point where your lens is as close to the eye level of the subject as possible? 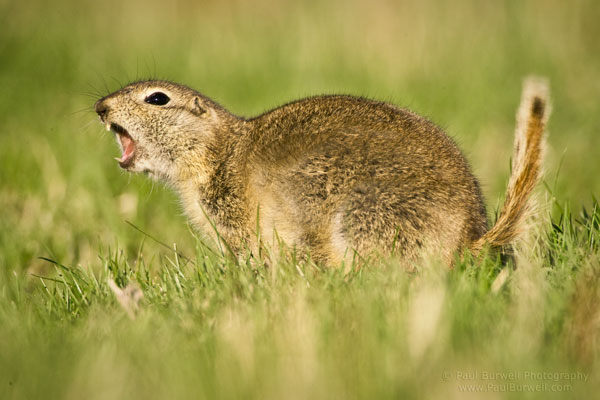
Richardson’s Ground Squirrel giving a warning signal – 6 inch camera height 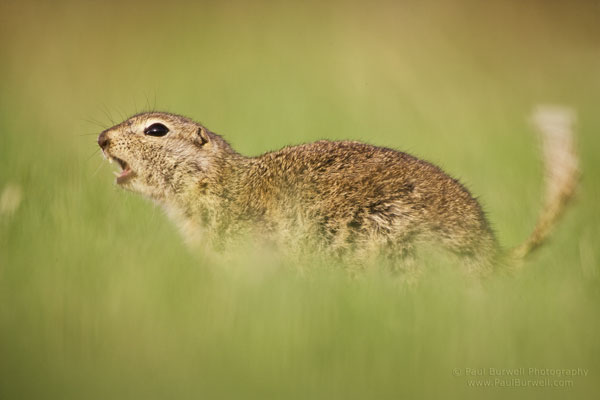
Richardson’s Ground Squirrel giving a warning signal – 6 inch camera height You can see the image becomes even more compelling with the lens and camera are now at the same level of the squirrel. I was laying in a prone position on the ground for these last two images, with the lens resting on a bean bag. In the first of the two images above, shot at 6 inches camera height, you can really see the delineation line of what’s in focus and what isn’t (the DOF). One could argue that the out of focus grass in front of the image is distracting, but, I’d argue that the dreamy effect created adds to the interest of the photo, and the squirrel’s head and eyes are nice and sharp. Summary and your turnI hope that these images, along with the accompanying text, help illustrate the point about getting to your subject’s eye-level whenever feasible. It’s not necessary to use a 500mm lens, you will have the same effect with whatever lens you have.
Post originally from: Digital Photography Tips. Check out our more Photography Tips at Photography Tips for Beginners, Portrait Photography Tips and Wedding Photography Tips. How Low Can you Go? An Illustration of Camera Angle for Wildlife Photography The post How Low Can you Go? An Illustration of Camera Angle for Wildlife Photography by Guest Contributor appeared first on Digital Photography School. |


 In addition to being the owner of the
 | You are subscribed to email updates from Digital Photography School To stop receiving these emails, you may unsubscribe now. |
Email delivery powered by Google |
| Google Inc., 20 West Kinzie, Chicago IL USA 60610 | |